Your Techniques on creating a pure black background

GR3Z

Suspended / Banned
Messages
706
Name
Graeme
Edit My Images
Yes
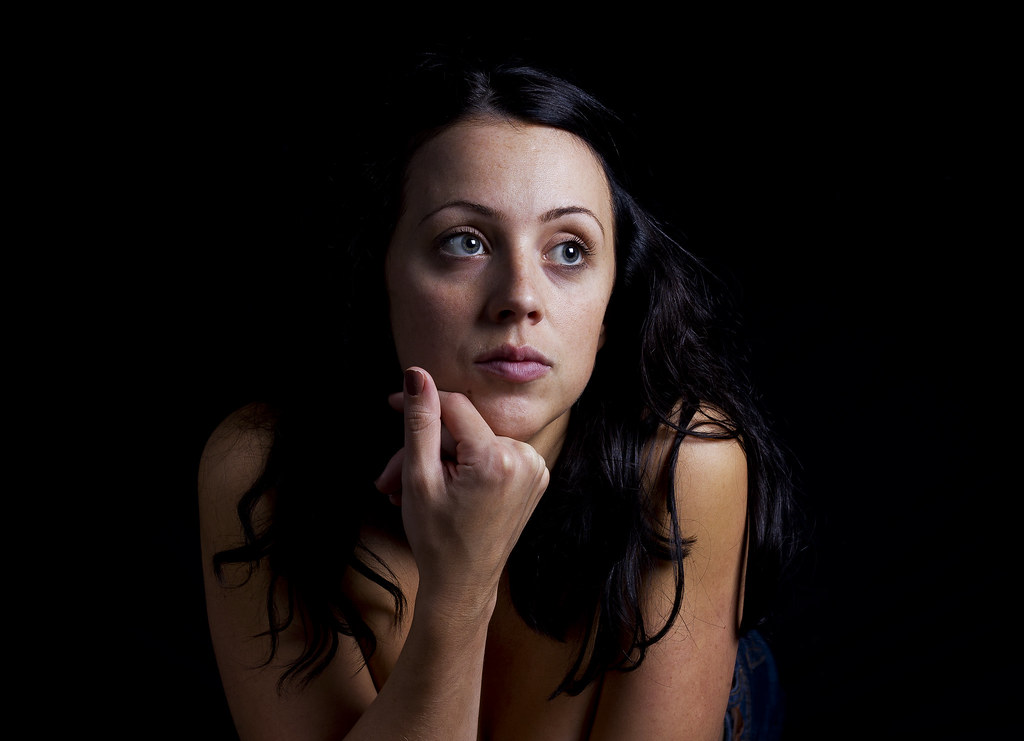
Its my first attempt of doing some portraiture against a black background im going to be taking some pictures of the gf

Ive got some backgrounds stands with some black cloth from the local market 2.5mx3m and set them up in our lounge

Ive got a speedlite/softbox and a reflector

im going to use my 50mm f1.8 on my 550d

Ive rattled a few test shots and i can see the background...Is photoshop the answer..

Whats you techniques? :thinking:
 
Simple question:)
Complicated answer:'(
1. If at all possible, have a black background. Paper isn't black because it's fairly reflective. The ideal background is genuine black velvet (not velveteen, which is pretty useless) but genuine black velvet is very expensive. Black cloth is a good alternative
2. Have plenty of distance (as much as possible) between the subject and the background.*
3. Have your lighting as close to the subject as possible*
4. Avoid, if you can, lights that directly strike your subject from the front, because the light will also strike the background. If the light is angled so that it doesn't hit the background then the background will appear totally black. Fitting a honeycomb to an angled light is a massive help with this.

*These factors work together to your advantage. The further the light has to travel from the subject to the background, the less light will reach the background. Very roughly speaking, every time it doubles the distance, the light diminishes to 1/4 of the intensity. And when the light is very close to the subject, the fall off of light is much greater by the time it has reached the background
Example: If the light is 6' from the subject and then travels another 6' to the background, there will be 4x as much light on the subject as on the background. If the light is 2' from the subject and then travels another 6' to the background, there will be 16x as much light on the subject as on the background.

If you light well, there is no need for any photoshop work on the background.
 
Thanks for the explaination Gary, just a couple more questions will it be better to shoot with the room lights on or off, as it now the evening and quite dark and is it better to shoot with a higher fstop say f8 to eliminate the extra light
 
Last edited:
Even with low powered hotshoe flash, the room lights won't make a scrap of difference at a high shutter speed, say 1/200th
 
That's fantastic, did you just use the black cloth and lighting to your advantage or is it post-processed for a perfect black background?
 
Only got on light at the mo but thanks for the advice... got some on order :)

Because of your light position, even a piece of white paper (as big as you can get) opposite the light just behind her head and out of shot (of course) will help with a bit of a rim light. Try it!
 
Thats an excellent first attempt Graeme and exactly the kind of thing I'm looking to do only on film and in b&w.
And Garry thats the best explanation of how lighting works I've ever read, makes it all so clear now.

I presume that the same rules apply to continuous lighting?

Cheers

Andy
 
Last edited:
Thats cool Graeme. Great first attempt. You should be able to get it right on camera with a bit of tweaking to your set up and camera settings. It looks to me like you have your light short at pretty much side lighting (to models left). You can use light shapers to prevent light spilling (hitting) the back drop or even just put a black board (or if you are using a small light source like a flash gun just put a folder close to the light) close to the light on the backdrop side of the light to stop the light hitting the backdrop. The other way is to have the model turn her head to her left a little bit and turn the light so its firing at a right angle to her cheek still and therefore firing away from the backdrop more (if you are happy not having a her facing straight at camera). Lighting the side of the face that is away from camera (short side lighting) can be very effective and beautiful as well!

Just a few suggestions though the image is a great first attempt!
 
Thats an excellent first attempt Graeme and exactly the kind of thing I'm looking to do only on film and in b&w.
And Garry thats the best explanation of how lighting works I've ever read, makes it all so clear now.

I presume that the same rules apply to continuous lighting?

Cheers

Andy
Yep, light is light and the same laws of physics always apply
 
Back
Top