Self Portrait Lighting Help

rpsmith79

Suspended / Banned
Messages
1,796
Name
Rich
Edit My Images
Yes
Sorry for all the posts asking for help, but i am a relative novice when it comes to photography

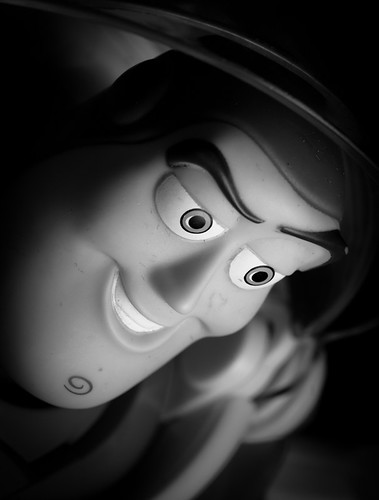
I generally steer clear of people photography as i am pretty rubbish at it, but i have been trying to practice by taking some self portrait shots, all of which turn out pretty crap, but i think my main problem is lighting

I don't suppose anyone has any links to any sites which might explain different types of light/lighting for portrait photography

Obviously i am not doing this in a studio, but just using the lamps and lights i have around the house

The sort of shot i am after is a B&W shot, so i am trying some side on type lighting to get some contrast across my fave, but it's either way too heavy, or not heavy enough

These are my efforts so far

1.

P7212962-2.jpg


2.

Portrait%252002.jpg


3.

Portrait%252003.jpg
 
The first two are great - creative use of shadow and the directional qualities of the light are strong, they really highlight your features.

I'm no expert of shooting using lamps but you seem to have decent shutter speeds and apertures, as they're sharp and have good DoF. The noise isn't intrusive either from what I guess is a high ISO.

Diffusion is key I honk; if you can diffuse the light it will create a softer fall-off of the light, so the shadows won't be as harsh and pronounced. The whole idea is that the diffusion creates a bigger apparent light source relevant to the subject. If you move the lamps closer then the shadows won't be as harsh - move them further away they become harsher. Diffusing has the same effect, but with a loss in light power, you'd have to open up the lens a little.

Try pointing the light at a wall and using the light fall off? It's basically the same as bounce flash - the wall/ceiling diffuses the light and become the bigger apparent light source, so things are more diffused. You just tailor your exposure accordingly.

Maybe stand in a corner and bounce the light close-by off a wall (thing angles and snooker tables :)) and you'll get a softer-looking light.


Portrait of a Space Ranger by Pat MacInnes, on Flickr

This shot was done with a 12" model of Buzz Lightyear and a mobile phone with a 4" screen to light it, held about 6-8 inches away. So that's a large apparent light source - the subject is only three times larger than the light source. It creates softness in the shadows. If that light source was 20ft away (and if it had enough power) the light source would be a fraction of that size and the shadows would be harsh

Hope I'm not going too technical but knowing about what your light is doing is as important as using artificial light in the first place. :)
 
Last edited:
Check out 'Rembrandt Lighting', 'butterfly lighting', 'loop lighting' on youtube for a few starter set ups. Understand them, how the differ and what characteristics they have.

Also try and get your head round 'broad' and 'short' lighting and when you would use each.

Once you have an good idea about these adding rim lights, kickers and hair lights can add extra dimension and detail.

As the above post says understanding the type of light is also a big factor. In simple terms - big means soft and flattering while small means hard and harsh.
 
Ahh cool, cheers for the adivce, that certainly gives me some more ideas to work with
 
Back
Top