I have a new shed - help me fill it

JonathanRyan

Suspended / Banned
Messages
10,765
Name
Jonathan
Edit My Images
Yes
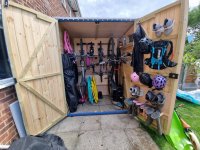
Everybody likes a project, right?

I have a new shed :) It's an 8ft X 8ft Apex in pressure treated timber with a Firestone rubber roof. Now I need to do things to it because that's what you do right?

First step will be to paint it. I have some Protek Royal as recommended by both the shed company and our fabulous local wood finishes shop. Next I have 2 things to do and I have questions on both.
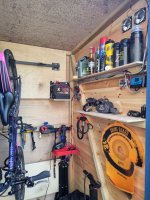
Shelves
I have a load of used 14ft scaffolding boards. I'm going to clean them up and cut to 8 feet long so I can shelve one side 3 boards deep. Plan is to make a frame out of timber, screw this to the shed and attach shelves to that. Wood is very expensive ATM but I can't find any recycled that looks right. Would I be OK using CLS or do I need treated wood? Shed should be dry but it's outside.


Gutters
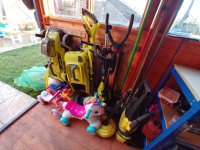
I need to attach gutters and it looks like the most cost effective is two half shed kits from Screwfix with some extra gutter to make up the length. This uses 76mm guttering. The problem I see is that the roof edge boards aren't vertical. they look like this

1690961707071.png

Do I fix to those boards? Do I need to worry that the gutters will be sloped?

Once we've cracked these 2 projects, I'll be back with questions about steps and skirts :) Who knew that they didn't actually finish sheds these days......?
 
RE. The gutters. Get some appropriatley sized metal "L" brackets (While you're at Screwfix) https://www.screwfix.com/p/corner-braces-zinc-plated-103mm-x-103mm-x-22mm-10-pack/14177 Bend them to form a vertical surface and attach the gutter brackets to those ...that's what I did so you know it's a good idea!

Shelves. I'm assuming the shelves are going to be INSIDE the shed. In which case I wouldn't bother with treated timber...you will have more choice and can always slap some fence paint on them...you'll have some left over from painting the shed. (y)
 
CLS will be fine inside the shed, it wont be sitting in moisture and I will guarantee the shed will rot before the CLS does.
The shed will only be dip treated so you can always treat the CLS if you wish.

You will fix the guttering to the shed not the roof. You want it under that lip no on it. Standard guttering will project about half way out under that sloping lip. I would buy 2 lengths that run the length of the shed rather than have a piece joined, it will flex less and be easier to get a fall on it to the down pipe, joins tend to sag and cause a low spot. and you dont have a lot of space for brackets around the window to add support
 
With regard to the shelves, you have 14' boards and will be cutting them down to 8', leaving 6' offcuts. I'd use the offcuts to make spacers to go between the shelves at the ends to give solid support and fix the support pieces to the shed walls. For extra peace of mind, I'd dip the ends that rest on the floor in preservative.
 
I love new shed day, almost as good as new car and new camera day.
You will fix the guttering to the shed not the roof. You want it under that lip no on it. Standard guttering will project about half way out under that sloping lip.


Exactly this, the gutter itself sits under that lip, this is mine on my workshop. (in need of it's yearly maintenance).

IMG_1555[1] tp.jpg


To fill it? Shelves, great idea. You'll need a workbench too, a very satisfying project to build.

My motorbike lives in mine, with my biking gear. I have professionally installed electrics too. I have an old TV, the CRT type, it was great back in the day and it still works, with the obligatory (but rarely used) Playstation, the very first one.

I have a vice and pedestal type grinding wheel, both fixed to the workbench. A small compressor is handy too.

I don't have slats in my workshop but you could fashion one into the side or end of yours and set up a hide section for photographing birds/wildife etc. That might not be your cup of tea though.

Fridge, for cold beers when buddies visit.

Storage is key, (shelves etc), it will keep it tidy.

Smoke alarm and also, a good security alarm.
 
Thank you all. It makes total sense the gutters go on the shed not the boards :)

Also I've found Wickes are half the price of Travis Perkins for guttering so I may as well for full size fits cut from 4m lengths as but the small kit.

Now all I need is a couple of dry days....
 
Thank you all. It makes total sense the gutters go on the shed not the boards :)

Also I've found Wickes are half the price of Travis Perkins for guttering so I may as well for full size fits cut from 4m lengths as but the small kit.

Now all I need is a couple of dry days....
I've found that buying the individual bit of guttering is cheaper than shed kits.
 
I've found that buying the individual bit of guttering is cheaper than shed kits.
I assumed it would be, but then I price checked at TP and it came out very dear for the boys. Wickes is a lot cheaper in this case.
 
Check you local council or water company they may do discounted water butts over standard retail. And go for 200ltrs over 100ltrs.
Ooo good tip, thanks.

Wickes want £40 for an ugly black butt and diverter and stand. Just ordered 2 from the council website for a shade under £80 delivered. Complete with link kit and all the bits.

Not a massive saving but they look a lot nicer and better made than the Wickes ones.
 
Thanks for all the help so far. Now because it's raining and it's cheaper to order things all in one go, I have 2 further questions.....

Skirt

We had the shed built on a "heavy base" which is plastic pegs concreted into the ground with bearers on them. This allows for unlevel ground. I now need a skirt to tidy up the edge. It currently looks like this.

PXL_20230802_073224065 (Medium).jpg
I was going to get timber gravel boards, screw them to the bearers and then paint them. But the shed is just over 2.5m and the only gravel boards I can get are 2.4 and I want a continuous length. I thought I'd get decking boards instead. One edge will be in contact with the ground - they are class 3 pressure tretaed - should they be OK? I don't mind replacing them if they only last 5 years but wouldn't really want to do it more often than that.

Step

As you can see, there's a bit of a step up to the door. Long term I'll pave a path to it and concrete something in but that's unlikely to be this year (and I may not get round to it next....). I was wondering about cutting a short sleeper in half and fastening left over scaffolding board to it. Does that seem a good plan? Anything better? I don't want to concrete anything bc it would need taking out when I do the path.

 
Yes to decking boards and make a step out of the same.
Agreed. If you have an off cut of the rafter material left use three pieces as joists for the step and screw 2 or 3 decking boards to them depending on how deep you want the step. I would probably go with 3 to give a bit of a platform personally. If you have no rafter material then sandwich 3 off cuts of deckboard together to make joist.
 
Last edited:
Getting there.....I'll do another coat and then guttering next weekend and then start on the inside.

PXL_20230806_154116164 (Medium).jpg
 
For shelving I like the cheap metal racing systems like this, they are quite space efficient compared to framing up units out of timber. Worth spending out a little extra on versions that come with plywood shelves rather than mdf if you are planning on storing anything heavy.


Tool storage and various hooks etc. as well as lidded storage boxes (expecially if you are storing birdseed or anything that may attract mice) are good to make sure everything has its space and stop it descending into chaos. With enough organisation you can make it bigger onthe inside than it is on the outside.


20210306_165202.jpg20210306_165211.jpg20210306_165351_HDR.jpg


And I would recommend a solar powered lamp for the winter months, just helps with finding things/putting them away when the light drops. I jhave been using this one for he last couple of years and still holding up OK.
 

Attachments

  • 20210306_165217_HDR.jpg
    20210306_165217_HDR.jpg
    178.2 KB · Views: 15
  • 20221118_125830.jpg
    20221118_125830.jpg
    205.8 KB · Views: 15
  • 20220703_152913.jpg
    20220703_152913.jpg
    220.4 KB · Views: 15
For shelving I like the cheap metal racing systems like this, they are quite space efficient compared to framing up units out of timber. Worth spending out a little extra on versions that come with plywood shelves rather than mdf if you are planning on storing anything heavy.


Tool storage and various hooks etc. as well as lidded storage boxes (expecially if you are storing birdseed or anything that may attract mice) are good to make sure everything has its space and stop it descending into chaos. With enough organisation you can make it bigger onthe inside than it is on the outside.


View attachment 397710View attachment 397709View attachment 397711


And I would recommend a solar powered lamp for the winter months, just helps with finding things/putting them away when the light drops. I jhave been using this one for he last couple of years and still holding up OK.
Wow. That looks amazing :)

Also, my next question was going to be lighting....I can't find a solar light that gives a decent amount of light and has a proper switch. They all seem to have silly remote controls, which is exactly something I won't be able to find in the dark .....

Did the one you have use a switch?
It gives out enough light to find stuff/put stuff away, but on the odd occasion I need to work in the shed in the dark I take in a more powerful battery powered light. That one has the silly little remote rather than a switch. I use some velcro to keep it on the inside of the door so that I always know where it is.

Eventually I plan to put a couple of solar panels on the roof and a car battery so that I can keep tool batteries charged up and would also allow to upgrade the lighting.
 
Wow. That looks amazing :)

Also, my next question was going to be lighting....I can't find a solar light that gives a decent amount of light and has a proper switch. They all seem to have silly remote controls, which is exactly something I won't be able to find in the dark .....

Did the one you have use a switch?

A small solar powered light (as per Dave's suggestion) would be fine for quick jobs that don't need too much light. A car (or bike - they're smaller!) with a solar conditioner should be enough for jobs that need a bit more, with any number of 12V lamps available to provide the actual light!
 
Full mains power with 4 double sockets and separate inside and outside lighting. My one extravagance is the outside lights are Wifi bulbs so just ask Alexa to turn them on before heading down the garden.
 
OK these things are never done, but for the moment it's done :)

Thanks for all the help - especially on the guttering! I've taped the joints for now pending the water butts arriving. Presumably there's some sort of glue for them?

View attachment 398941View attachment 398937View attachment 398939View attachment 398942View attachment 398943View attachment 398938


Gutter joins usually have a rubber seal to stop (or, at least minimise) leakage and the downpipe diverters rely on gravity to keep the water heading downwards! Might be worth using a short screw through the downpipe bracket just above the diverter and near the bottom to stop it drooping. Also worth spending a little time getting the outlet of the diverter at (as close as possible to) the same level as the inlet of the water butt.
 
Gutter joins usually have a rubber seal to stop (or, at least minimise) leakage and the downpipe diverters rely on gravity to keep the water heading downwards! Might be worth using a short screw through the downpipe bracket just above the diverter and near the bottom to stop it drooping. Also worth spending a little time getting the outlet of the diverter at (as close as possible to) the same level as the inlet of the water butt.
Yes - thank you. The joins are exactly as you describe - I didn't explain myself well :)

I've used offset bends like these


to route the downpipes down the back of the shed where I can easily position the butts and where the water can better soak away. One end of them has a sealed join but the other is just a push fit without any rubber. The push fits leaked until I taped them.
 
Hmmm... Those bends' joins don't usually have (or need) a seal - the flow of water should be enough to keep them reasonably leak free as long as the downhill side of each join is pushed in as far as possible. If the joints need to be 100% watertight, I'd use silicone sealant rather than dust tape.
 
I have so much 'stuff' that I could help you fill your shed with. Just give me a date and I will book the lorries!
 
Back
Top