Hi Garry the first photo reminds me of a Fanny Craddock cook book, the second Heston Blumenthall.
I know that you intention was to highlight the prawns but the difference in the egg is remarkable also.
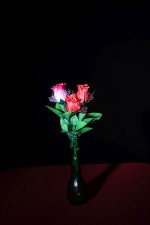
Do you have an equation or ratio for the rear light or are you adjusting to what "looks" best
Barney, a more complete reply, now that I have more time. . .
Yes, effect lights are essential, there's always a key light, doing around 80-90% of the work, but it's the dedicated effect lights that bring life to the shot - perhaps a hairlight or another type of backlight for portrait shots, but still-life shots have exactly the same need. Still-life is easier, just because it keeps still!
This was just a very simple "this is what can be done in a small home studio" type of tutorial. My living room is tiny, not only do I need to do all of the usual shot planning and find space to do the shot, I also complicate matters by having a second and sometimes third camera for the video. plus a video light, which I normally bounce off the ceiling. If I wanted to, I could always pop into the Lencarta warehouse and use their much bigger space, but that would kind of defeat the object of pointing out that anyone can do this at home.
But, there are limitations. If this was a pro shot, done to much higher standards, I would use any number of extra lights, usually honeycombs, focussing spots or fresnel spots, normally pretty much from above, each would need its own boom arm for position, and this of course would need a large pro studio. I no longer have all that gear, nor do I have the space, and even if I did, the vast majority of people who might be tempted to do it themselves wouldn't be able to anyway.
Video is a strange media, it has the effect of compressing time, something that takes 4 hours to do in real time and which can be a bit fiddly is shown in just a few minutes, and the viewers don't see the failures, it did take a bit of trial and error to get the light position and exposure right.
I used my very specialised honeycomb because I have one, although I did suggest workarounds for people who don't have one. It was aimed specifically at the prawns because it was obvious to me that the prawns are the only expensive ingredient and so a pro shot would probably be about the prawns. Because lack of space dictated that the honeyombed light needed to be a long way away (about 5' from memory) the light spread out further than was ideal for just the prawns, so I sort of accidentally lit the egg as well, which worked - serendipity
")
- although I could of course have reduced the spread with cinefoil
https://www.ebay.co.uk/itm/285991219591 or similar flags.
These extra lights involve money as well as space, but for non-pro shots there are alternatives, The cheap focussing LED torches available on-line are useful,
https://www.ebay.co.uk/itm/405197532907 because they can produce a very controlled light that can be fixed in place with rubber bands or sticky tape. All that's then needed is to increase the shutter speed to the point where they have the required effect. If I'd done something like that I might have lit the prawns, egg, radishes and cucumber separately. Mixing light sources is generally not a great idea because of colour temperature differences, , plus uneven light patterns, but with this type of home studio shot I doubt whether anyone except the photographer would notice, so would be good enough.