Better scanning results tips?

cardiff_gareth

Suspended / Banned
Messages
2,734
Name
Gareth
Edit My Images
Yes
Hiya,
I decided to start this new thread as I was starting to feel like I was spamming the main 'scanner thread' and it was diluting from all that very useful info that was on there.

So far I know that turning off the ICE may improve my scans but, and maybe I'm trying to run before I can walk, but I read few comments/websites and watched a few YouTube videos where they said directly mounting the 120 negs to some ANR glass and using shims to lift it to the focusing plain would improve scan sharpness?

Also, not using the Epson Scan software but using SilverFast also seems to yield better colour representation from what I've watched?

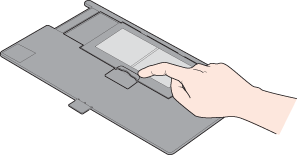
I have the older Perfection 4490 scanner so it doesn't use the flatbed for scanning negs but uses the scanner that's built into the lid. I'm wondering then, if I get some ANR glass will I need to use shims to lift the ANR glass off the scanner glass.

Lastly, due to using the scanner build into the lid and this being a strip in the centre of the lid, are there any tips for lining up the negs so they're in the right place?!

Thanks in advance
 
From the online guide, particularly No 4 : https://support.epson-europe.com/onlineguides/en/perf4490/html/i_index.htm


step_3.gif
Close the cover over the film and press it down until it clicks. Then press down on all the edges of the cover to secure it.


haz035.gif


step_4.gif
Place the film holder on the document table so that it is aligned with the upper left corner. Make sure the tab labelled “B” on the film holder fits into the area labelled “B” on the scanner.
 
Yeah done that already but the video I watched mentioned about the negs not sitting flat and could warp images when scanning hence the glass technique.

Has anyone used SilverFast and Epson Scan and can say if there is indeed a better quality scan from SilverFast with sharpness and colours?
 
it doesn't use the flatbed for scanning negs but uses the scanner that's built into the lid
Are you sure there is a scanner in the lid? On the V550 there is a light in the lid that moves at the same time as the scanning bar in the bottom.

In terms of focus, there isn't a lot in it. Try placing a steel rule on the bed with one end propped up by a few mm so the scan goes from on-the-glass to a few mm above the glass, on the V550 I don't see much difference when I do that. The main issue I find with curled negs is Newtons rings if the neg touches the glass.

Has anyone used SilverFast and Epson Scan
I haven't used Epson scan for some time but I have used it in the past, I now always use Silverfast. To some extent a scan is a scan, the software applies effects after the scan and Silverfast gives more control.
 
For me, the revalation was in post scan sharpening.

I tried to do my sharpening in Silverfast but what I saw on the screen and what I got in output were 2 different things - and the output had that over-sharpened nastiness you see on... over sharpened images.

My digital camera scans need almost no sharpening because.. well... digital... However the film stuff all needs what I'd call "aggressive" sharpening.

If you have LR...

Sharpening Amount: How heavy the sharpening is. Typically I'm halfway or more on this slider.
Radius: If you imagine each pixel as a dot, you can control the size of those pixels with the radius slider. Bigger radius is a more pronounced effect. So if you have massive resoluition scans (lots ot pixels) you will need to increase this or your amount (the slider above) won't be visible to the eye. Needs to be higher, the larger your scan size (which typically is proportional to the format, so 120 needs more, 4x5 needs even more etc etc.) It's really imporant, because you can end up heavily sharpening something you can't see and it can look quite nasty.
Detail: This is a fine detail slider. Again, on high res images you're not going to see much with this but it's less important anyway.
Masking: Controls how much of the image to apply sharpness to. Another key slider - and mine is often way over to the right, because I only generally want the fine edges to be sharp. The only thing worse than digital noise, is sharpened grain IMO. Holding the Alt key down while dragging the slider puts a black/white mask on the image that shows you where the sharpening will be applied.

I've farted around with BetterScan holders and those tiny screws, trying to raise and lower the neg and really not seen any measurable difference. I found all neg carriers rarely held the film flat which completely negates any micro management. The only thing that will keep a slide absolutely flat is wet mounting (look up NIck Carver's video on it) and/or an ANR glass cover. All my 120 gets scanned straight on the glass these days and I'm very happy with up to A2 print size. The only way to tell the difference between digital & film is that the digital shots lack any character.
 
Thanks both, I presumed there was a scanner in the lid as when I got it I unlocked the scanning arm for transit and when I fired it up, it clicked like crazy before I realised there was a second transit lock on the lid. Presumed there were 2 scanners for either film or documents!

Saw that video with the wet scanning, um, yeah, I might leave that for now!

So now we know that it uses the flatbed for scanning, if I place the negs just on the glass, is there a way of lining them up with that lid light?
Sirch, are you saying you put a steel ruler on the flatbed and place your negs on that so the neg sits just off the glass?

SilverFast is a go then :cool:
 
I think in reflective mode there is a light in the scanner bar in the bottom but for transparencies that light would just go through the neg, so there is light in the lid that shines through the neg on to the scanner in the bottom.

are you saying you put a steel ruler on the flatbed and place your negs on that so the neg sits just off the glass?
No it's just a way of checking focus, no negs involved. Put the ruler on the glass so that one end is touching the glass and the other end is lifted up by a couple of mm so if there was an ideal focus point it would be somewhere between either end of the ruler. Scan it in reflective mode and view the results, as I said I have tried it and there is no real difference between the end touching the glass and the end that is away from the glass. So on the V550 at least the DoF of the scanner is at least a couple of millimetres.
 
I’ve had way better results using a macro lens. I used to use a v550 but it’s not very good at 35mm. Now when I scan I use a light table, raise the film holder above the table so only the film will be in focus and just stick the camera on a tripod. This method gives me scans from 35mm that look just as good as 120 did on the v550
 
Ok, my two pennorth:

Dust - it's your number 1 enemy when scanning negatives. When using a flatbed scanner, use a rocket blower to blow any dust off the scanner glass (first the lid glass, then the flatbed glass) and close the lid. Load your negs into the holder, pick up the holder and let it dangle vertically while you blow any dust of the negs with the rocket blower. Open scanner lid, place negs in scanner, then blow any dust off the negs again with the rocket blower and close the lid. I can't promise that will get every last speck of the negs, but at least you've tried.

Also, find out which way round your scanner takes the negs - shiny side down on my Epson V600. However, depending on the film, this may not be as easy to determine as it seems, so take your time to find out. Making a note of which way round the text on the film edge is might help with this, but I always forget to do this!

Take some time to experiment with DPI. Many scanners will quote seemingly wonderful scanning resolution in DPI, but this is usually achieved by 'interpolation' rather than true optical scanning resolution. So do some test scans at various DPI, zoom in and pixel peep and see which DPI setting gives you the best results. For me, in JPEG on my Epson V600, I find 3.200 dpi gives the sharpest results with the most detail. Anything more or less becomes progressively, but subtly (to star with) less satisfactory (to my eyes anyway).

JPEG or TIFF? How much time and computer disc file space do you have? To me, it's like JPEG and RAW when using a digital camera. A modern DSLR will give me great results in JPEG, but it I were taking some important photos then I'd set the camera to save both. I could then play around more with the RAW file if I couldn't get what I wanted from the JPEG version. Mind you, if I had that good a shot I'd probably send it off for a professional scan (or even a drum scan) and wouldn't be messing about with it on a home flatbed or desktop scanner.

120 seems to scan a lot better on a flatbed scanner than 35mm does. This was taken with a 1950s Ensign Selfix 1620 camera (6x4.5 format), and zooming in (click on the photos to view and zoom in Flickr) reveals the detail captured using a mid-range priced home flatbed scanner (Epson V600) scanning a black and white negative as a JPEG.


If I were shooting only 35mm film then I'd think about getting a 35mm film scanner such as a Plustek, as I believe I'd get more detail and better looking results from one of those. As I shoot both formats, and my flatbed will scan 12 35mm negs in one go while I'm doing something else, then I'll put up with the compromise, or go for a professional high-res scan from a reputable photo lab if I've got a roll of 35mm film I think has some nice looking photos on it.

I hope this post is useful to someone; the opinions of others may vary.
 
Last edited:
Hi all, another quick question.

Just getting around to playing with different resolutions to get to that 'sweet spot' scan and the best quality but I've run into a snag.

Noticing in this area on my scans a line going through all of them. I checked the JPEG scans I got from the lab and no lines in the images. Checked the negs and again I can't see them so I'm thinking it's clearly the scanner. Is there a way to fix this or is the scanner knackered and needs to go?

Scanned at 4800dpi, imported into LR, resized to 300dpi and 1024px longest edge. Saved at quality 10 of 12
 

Attachments

  • test.jpg
    test.jpg
    489.9 KB · Views: 20
Last edited:
Hi all, another quick question.

Just getting around to playing with different resolutions to get to that 'sweet spot' scan and the best quality but I've run into a snag.

Noticing in this area on my scans a line going through all of them. I checked the JPEG scans I got from the lab and no lines in the images. Checked the negs and again I can't see them so I'm thinking it's clearly the scanner. Is there a way to fix this or is the scanner knackered and needs to go?

Scanned at 4800dpi, imported into LR, resized to 300dpi and 1024px longest edge. Saved at quality 10 of 12

It's most likely some dust in your scanner. See this page (about three-quarters of the way down:


Not sure if it's something that can be easily fixed or not as I've not looked into it further.
 
It's most likely some dust in your scanner. See this page (about three-quarters of the way down:

This (IMO). Mine was dust on the glass surface and fixed with a simple cloth wipe.
 
I thought the scanner arm / scanning sensor was broke! So that red line that travels vertically through the frame is caused by some dust on the glass?

For me (V550) the scanner does some sort of pre-scan-warm-up thing where it scans the edge of the bed for a sec before it begins. I had a bit of dust there and it was like it was saying to itself, "that bit doesn't need scanning", so I ended up with a long line through the frame.
 
Yeah done that already but the video I watched mentioned about the negs not sitting flat and could warp images when scanning hence the glass technique.

Has anyone used SilverFast and Epson Scan and can say if there is indeed a better quality scan from SilverFast with sharpness and colours?
I'd suggest to really get to the bottom of differences between the two software packages, you could do with just downloading the trial of silverfast and seeing how you get on with it
 
And I'd just add that scans always need some sharpening, so if you do a side by side compare, the resulting sharpness will depend on the software defaults. I started scanning with EpsonScan (came with the scanner) and Silverfast (cut down version, also bundled). I quickly switched to VueScan which made a life a lot easier.

Also, from personal experience, different scan settings can make the difference between an image that can be printed directly, and one that no amount of Photoshop can fix, from the same negative.

Getting it right takes experience and experiment. If one package is initially easier to get good results from, it doesn't follow that more work put in with a different one might not give even better results. I wouldn't know, as I've stuck with VueScan which does all I want.

Caveat: I'm a black and white photographer, rarely using colour; but when I have, I've been happy with the results.
 
When I've installed either viewscan or silverfast it stops my epscan (which I mainly use) from working..very annoying if you want to try either program :mad:
 
When I've installed either viewscan or silverfast it stops my epscan (which I mainly use) from working..very annoying if you want to try either program :mad:
I have all three installed on Windows 10 without any conflicts (although I don't think you can run them simultaneously).
 
I have all three installed on Windows 10 without any conflicts (although I don't think you can run them simultaneously).

h'mm for me, think it might be something to do with the twain driver being over ridden (for Epscan) that stops it working, so have to re-install.
 
Okay! So an update.

I removed the lid and disconnected it from the rear of the flat bed and set it aside and then, looking down at the glass from above saw there were 2 screws at the end of the scanner. With these undone I was able to slightly open the scanner up and get under the glass. Here I used a hurricane blower brush to blow air over the length of the scanning sensor arm. With that done I screwed the 2 screws in and put the lid back on.
Again armed with the hurricane blower I opened the lid, blew the glass on both the lid and the actual flat bed and closed it. Then I blew the neg in the holder both sides before opening the lid, reblowing the glass, placing the holder in and closing the lid. Basically lots of air blowing and fast with the lid opening and closing!

The first preview, no band on it! Scanned! I'd say there was a 70% success rate with the band that was appearing in the scans but when it did I got the hurricane blower out and repeated the above again but obviously didn't reopen the scanner up and blow air on the scanning arm everytime.

This worked well and I managed to scan the negs. New problem!

This is a straight scan but converted to black and white:
Straight Scan by Gareth Williams, on Flickr

Lots of dust and other particles, zooming in to 100% you can even see some of the lines where the printing machine has marked the negs when it's gone through it when being processed. Is this because my settings are wrong and set too high? The grey attached image is a 100% crop from the sky where you can see the actual film emulsion itself! Again also attached are my settings in Epson Scan.

This is the end result of the scan I made. There are some marks and dust in the sky still, I didn't remove them all, I'd be there all week and shows that it's an organic image I suppose, well kind of as now its a digital image as it's a scan and digitized!

Edited by Gareth Williams, on Flickr

Kinda happy, definitely progress and a step in the right direction, just need to sort out them specks and dust now!
 

Attachments

  • Capture.JPG
    Capture.JPG
    86.1 KB · Views: 13
  • Capture2.JPG
    Capture2.JPG
    56.9 KB · Views: 12
I'm not an expert on scanning (nor Photoshop) but in my experience, your sky looks normal. At the resolution you've scanned, you'll get an almost 3 feet wide print at 300 ppi, so that's basically what you're looking at, close up, when you view at 100%. Possibly an even bigger enlargement, as you're probably not getting 300 ppi on your monitor.

My methods of coping with dust - other than trying to avoid it - are built around Photoshop CS2, and I have no doubt better or easier methods are available in more recent softward.
 
A tip for obtaining the most out of a scanned négative that was passed onto me by an old member ( well actually he was quite young) on here who hasn’t been around for yonks.
He was called David iirc and spent a fair amount of time with Rob Hooley messing with scanners and settings to get the best from them.
Anyway he suggested doing as much adjustments to levels / curves etc in the scanner software prior to making the actual scan.
The theory behind the idea was of working with the equivalent of a RAW file rather than a processed jpeg ( or tiff ) file in PS.

I found / find it beneficial and thank David ( wherever he may be) for sharing his findings.
 
Last edited:
A tip for obtaining the most out of a scanned négative that was passed onto me by an old member ( well actually he was quite young) on here who hasn’t been around for yonks.
He was called David iirc and spent a fair amount of time with Rob Hooley messing with scanners and settings to get the best from them.
Anyway he suggested doing as much adjustments to levels / curves etc in the scanner software prior to making the actual scan.
The theory behind the idea was of working with the equivalent of a RAW file rather than a processed jpeg ( or tiff ) file in PS.

I found / find it beneficial and thank David ( wherever he may be) for sharing his findings.
Not @PMN then? He and @robhooley167 used to do scanning things together for a while. Paul scanned some of my father's Dufaycolor 6x9 transparencies for me...

I was very taken with the idea of doing as much PP in the scanning software as possible (particularly when I was using Silverfast), because obviously you're working in the maximum possible image bit space with the least possible degradation. However, the PP tools in SF (in those days) were pretty naff, and Vuescan is even weaker in that respect, so I generally go with a "good enough" scan and then try and improve it in... Aperture (still!). But then, if I tell you I still scan to JPEGs that probably tells you all you need to know! ;)
Yes PMN
That’s him!
Where I got David from I dunno, sorry Paul.
 
With Vuescan, I find that I can make a colossal difference to a scan by changing what I tell the software that the film is. It's usually possible to get a scan that's almost or actually good enough to make a decent print. N.B. I am not a colour photographer.

I have also found that it's equally possible to get a scan that is so compressed and flat, that Photoshop seems unable to fix it.

The photo of Hutton le Hole that I used to illustrate LF lens resolution is a case in point. The first attempt at the scan was unfixable afterwards. But remember, this would have been 16 years ago...
 
Last edited:
Back
Top