@Johnathan, and others who wish to have their own studio. You aren't alone in this situation.
My whole adult life, before I finally retired, I had wanted badly to do photography of any kind, but the demands of my wife and family of 4, plus the crazy long periods of extensive overtime at my job, all but kept me away from photography. But I did manage to take snap shots of the kids, especially when I took them somewhere.
I became a photographer in about 1952 when I received the gift of a Kodak Brownie camera with flash gun. I fell in love with this new hobby and my dad helped me build a small darkroom in our basement. A year later my dad let me have his Argosy 35 mm camera, so the quality of my photos went up significantly. One day a few years later, I was showing my friends some of the photos that I had brought to school and one of the teachers saw what them and asked if he could look at them too. I let him and a few moments later, he said " these are very good". Would you be interested in taking yearbook photos with the school's camera? Well, I then got to haul the school's big Graflex Press Camera with a 5 D cell flash, a bag of flash bulbs, and a bag of flat film packs around the school whenever I had the time.
I shot mostly the school club groups and the sports for the last three years that I was in high school. Again, with the need for getting my education, and the clubs that I was part of, My available time for taking yearbook photos was quite short, as I was involved in the stage club, so helped with the lighting and set builds. I also showed all of the feature movies in the auditorium. The art teacher had worked in one of the NY theaters on Broadway, knew lighting and set design, so helped me learn stage lighting and set design quite well. So well that near the end of my senior year the principal called for me to come to his office. All the way I kept thinking "What did I do now?", but he had a smile on his face as he welcomed me in. There was another gentleman there with us, but the principal's first question was "Have you found a job for the Summer?" and I replied "Not yet, but I'm looking".
Then he introduced me to this other man, saying "He owns an Off Broadway Summer Theater and needs a stage manager". Really, it was a one man operation, with a helper when I needed help. I asked about what he wanted me for, and he described what I would need to do, then asked If I wanted the job, telling me how much he would pay me. I accepted the job immediately, since it was way higher pay than minimum wage and what many of my friends were finding for their first jobs.
There were shows 6 nights a week with a feature movie one night, an Off Broadway entertainer or group another night, and a dance one night with a group or band that had a recent pop record. The other three nights were local talent, sometimes including a local short play, other nights musicians, etc. There were occasional afternoon shows too, sometimes cartoons and kids movies.
I became an electrical engineer and after college, and I ended up working on a special camera for NASA, to take mapping photos of the Moon from an orbiting rocket. At the time we didn't know why they wanted to do this, but then the Apollo Moon Missions provided the "why". The maps were in case the Astronauts didn't land where they were supposed to, and these maps would help them navigate on this strange new place. My photography experience and the fact that I was now an Electrical Engineer, got me that job quickly, and without much searching. After this project I ended up developing, and sometimes building electrical controls for high speed high precision manufacturing machinery, and I did this almost until my first retirement. All through my career and marriage, and then while raising four children, I rarely had the time or money for photography, but did push aside all of the living room furniture, and drag what photo gear that I had out of the closet and set it up. An ironed bed sheet was hung over the French Doors, some of those reflector lights with the spring clips attached and many sizes of standard light bulbs were my lights. Changes in bulb Wattage (hot, so needed leather gloves) and distance got the light level that I wanted. For light stands I made them out of wood, with a base and a long vertical piece, then clipped the reflector lights at whatever level that I wanted. Onion skin paper was placed over the lights to diffuse the light, but it didn't work very well. I took photos with this DIY pile of cheap junk, but it worked well enough for the B/W shots that I was taking. But then everything had to be packed up and put back in the closet "For the next time". With 4 kids wanting to watch the TV, I was rushed the whole time. I did rent a studio a couple of times, but it was very expensive, so I didn't do it much. The owner did give me a break on his usual price, and I had to schedule my shoot to when the studio wasn't going to be used by anyone else, but did manage to do it a couple of times. Back when I was the stage manager, if the stage was clean of everything and not scheduled, I did use it with all of the curtains closed too, but only a couple of times.
So I had always wanted a studio so where I could have good lights, good backdrops, and good cameras that I could leave set up and ready for the next time that I had the chance to use it all, but in my life I never had the chance to own one, and raising 4 kids I had almost no time left to get serious about photography. Then Digital photography got started. I had always hated working with the chemicals, so this raised my interest in digital photography very quickly. At first the cameras, even the best were terrible. Then I finally had the money for a good camera and in 2000 I bought good camera, a Sony MVC-FD98. It had a whole 2.1 megapixels and a pretty good lens, but used 3 1/2" floppy disks for recording, and 4 376 K high resolution photos was all that a floppy disk could hold in Jpeg format. But it could take some really nice photos and they still looked good when printed 8 X 10". I still had kids in the house, but over the next few years each moved out. So 5 1/2 years ago I realized that there was a 2nd Master Bedroom Suite upstairs in my present house and the bedroom was 19 X 26', so it would make a small, but acceptable studio for me. So I worked on the kids to get their stuff out of it, and then began creating the very first studio of my own. The 8' ceiling has been my only significant problem, and changing the roof line to fix this is not going to happen, so I'm discovering that it does make a pretty good studio anyway. There is a full double bathroom and a walk-in closet off the shooting room, and I've transformed the large hallway at the top of the stairs to work as the "hair, makeup, and break area, but the break supplies are out there, but we usually end up taking the breaks in the shooting room.
I've set it up for Portraits, Small Groups, Still Life, Product, and as a small video studio. It had to be capable of switching relatively easily and quickly from one type of use to another, and I managed to figure that out and build it to suite me. Then COVID hit, and my studio saw almost no use for two years. My plan had always been to take professional photos for close friends and family at little to no cost to them. I don't need the money, so this studio is mostly only for me to experiment with light and take the best photos that I can, mostly for just my enjoyment, but then 3 1/2 years ago my wife fell in our laundry room and broke both her back and her pelvis. My youngest son developed Muscular Dystrophy, so now can't work and is an electric wheelchair, so he is back living with us and I am the caregiver for both of them. So again, but this time I have everything set up in an almost perfect studio, just one flight of stairs away, and I have very little spare time to use it. I do have a grand daughter coming over two times a week to help me with the laundry and floor cleaning, but has a 3 yo daughter, my great grand daughter that has to come with her mom. So the efficiency of this extra help tends to be considerably inefficient because of mom's need to take care of both my house and her daughter. Still, they are both wonderful to have visiting, and anything that does get done is something that I don't have to do. So I get a little more time to spend upstairs in the studio, but so many breaks taken that I keep forgetting what I was doing before I needed to go downstairs. I'm cooking most meal for us, picking up the trails of drops that all leave behind, and doing whatever else is needing to be done, and I still can't use my studio that way that I had wanted for my whole lifetime.
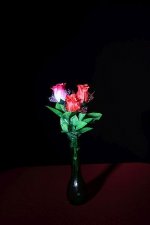
I'm 83 now, and with considerable health problems of my own. I just had heart surgery #9 back in August and I'm not really back up to speed yet, and even when doing well I am considerably slower than when I was young. I had knee replacements 15 years ago, but they aren't as good as the originals, but they don't hurt though, and that's a plus. I've had Cancer twice, and I think I've beat it. I also have a pacemaker now, so I have an internal clock to keep me running on time. I consider myself to be "Bionic" now, as I have a lot of metal and plastic scattered all through me from other situations and accidents in my life too, but I'm still going. I've had a "Still Life" flowers in a vase shoot that I started to do back in May that I'm still working on. Fortunately this time, they are artificial flowers, so they are waiting for me. I now have the three lights that I think I will need all in position, but haven't set their levels or their final accurate position, yet. Maybe I can do this this afternoon, but probably not. I keep hoping.
Well, that's the story of my long wanted photo/video studio. It's taken me most of my life to get here, but I still can't enjoy it as I had planned. It's all set up, with 6 motorized 10' wide backdrops, power on the ceiling on both sides of a ceiling lighting support grid with 8 LED light panels semi-permanently up their in a wide leg "U" shape for doing videos, and they are high enough so I can set up and do my other kinds of flash photography below them. With the power available up there, and my ceiling lighting support grid, I can hang a light anywhere in about a 10 X 19' area, so I power my lights from above, even if they are on C Stands below. This way, there are no power cables on the floor, and very few light stands to trip over. Even my tether cables runs up to the ceiling grid and then over to the center of the area where I usually use the still or video cameras. with enough extra hanging down to let me move freely around with the camera, yet have no tether cable on the floor either. I have a wireless control system for every light and a remote on each camera stand that allows me to turn on and off the power to each kind of lights that I want to use, without ever needing to climb the ladder to turn them on or off. I power my studio strobe with one button pair, my LED light panels on or off with the second button pair, the third controls a 500 watt focusing halogen theater spot light located on the ceiling grid camera left, the fourth button pair controls power to the second 500 watt focusing spot light located on the ceiling grid camera right, and the fifth button pair on the remote controls power to 4 UV LED light panels that are also on the ceiling grid. I bought these in the hope of doing some Halloween shots and have iridescent paint and make-up designed for this, but I didn't quite get all this set up for last Halloween, maybe this year will see some use out of them. I have also remotely controlled the ceiling (work light) in the center of the ceiling. This was the old bedroom light location, and for the shots that require low F-Stop settings I need to turn this ceiling light off for the shot, but then back on so I can see to move around. With only the light switch at the door for this light, I had to go there when needing to turn it off and then back on after the shot, so now there is a wireless switch at each camera stand, one by my computer, and another on on the wheeled toolbox that I use as a place to set my camera when I need to change something. It's always near me and camera left.
My walk-in gear closet is now full. My soft boxes that I use most are stored on wall hooks along the studio wall camera left. To camera right along that wall are three windows and they are Southeast facing, so a lot of Sunlight comes in through them during the morning hours. Just below these windows are computer tables for my printers, battery charging, second computer and display, etc. So I have installed sliding closet door tracks on the ceiling, running along side of the ceiling light grid. There are four tracks running parallel to each other, and on three of them I have 4' X 7' insulation panels painted white and hanging one per track on them. I can shove these toward the East wall and stacked next to the background roller system, or pull them out so that each slightly overlaps the one next to it and they block the Sunlight from the windows. These serve to give me a second backdrop at 90 degrees to the main backdrop system to use as well, and they block the view of the computer tables and contents from the rest of the studio, giving me a less cluttered looking studio and better light control when I'm shooting in the mornings.
Well, a long story, but I hope you can gain from it. You aren't the only one wishing that you could have your own studio. Don't hesitate to ask questions about any of this, and I'll answer them as best as I can. Do what you can with where you can, even if it's as temporary as my living room studio setup. Life never seems to give us much fun time, and you aren't alone here. Maybe some of my studio dreams and then finally getting one will give you at least something to dream about. I have a friend who came here because he's starting to build his own studio in his basement. He has the basics now, and is adding to it gradually, but he frequently calls with questions. I know he'll be back, because his memory is fading a bit since his last visit, but he is getting there, however slowly. If you can DIY and improvise, you won't need to spend a lot of money. Buy what you need as you can afford it, and DIY what you want if the money isn't there for the good stuff. I don't recommend those spring clip lights from Home Depot though. There is much better stuff at reasonable prices out there. Another friend made a soft box from an aluminum disposable turkey roasting pan and a white pillow case. He says that it works, but I haven't seen the results. Improvise when you need to. It will keep your brain busy to help you with what you need.
Charley


 viltrox.com

")
 .
. ")