Hi.
Canon 5dmk3 - Canon 70-200 2.8 - Tether cable - Shot RAW
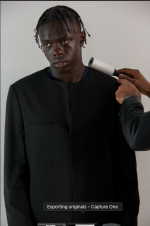
I shot tethered a few weeks ago in a studio environment, tethered to my laptop, images and lightiung looked great.
I shot direct to my macbook. I forgot to set the save as card and mac.
I got back and obvioulsy all the images already on mac - saved in the C1 catalog.
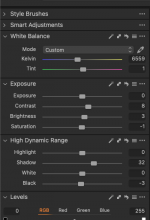
They looked good in C1... But I noticed it had automatically adjusted the levels, I think mainly it boosted all the shadows, but all images were fine. When I sent an image to photoshop to edit it toally wacked out all the levels...
I then got the images form the C1 and saved to my external hard drive... I then added on to my mac docs folder and imported that folder, now the images are all much darker.. what the hell is going on here. I am not a noob, using lightroom for 10 years and come onto C1 5 months ago, but first time I shot tethered with C1.. Not happy....
Is there some silly setting I have to apply on import??
Canon 5dmk3 - Canon 70-200 2.8 - Tether cable - Shot RAW
I shot tethered a few weeks ago in a studio environment, tethered to my laptop, images and lightiung looked great.
I shot direct to my macbook. I forgot to set the save as card and mac.
I got back and obvioulsy all the images already on mac - saved in the C1 catalog.
They looked good in C1... But I noticed it had automatically adjusted the levels, I think mainly it boosted all the shadows, but all images were fine. When I sent an image to photoshop to edit it toally wacked out all the levels...
I then got the images form the C1 and saved to my external hard drive... I then added on to my mac docs folder and imported that folder, now the images are all much darker.. what the hell is going on here. I am not a noob, using lightroom for 10 years and come onto C1 5 months ago, but first time I shot tethered with C1.. Not happy....
Is there some silly setting I have to apply on import??
Last edited: